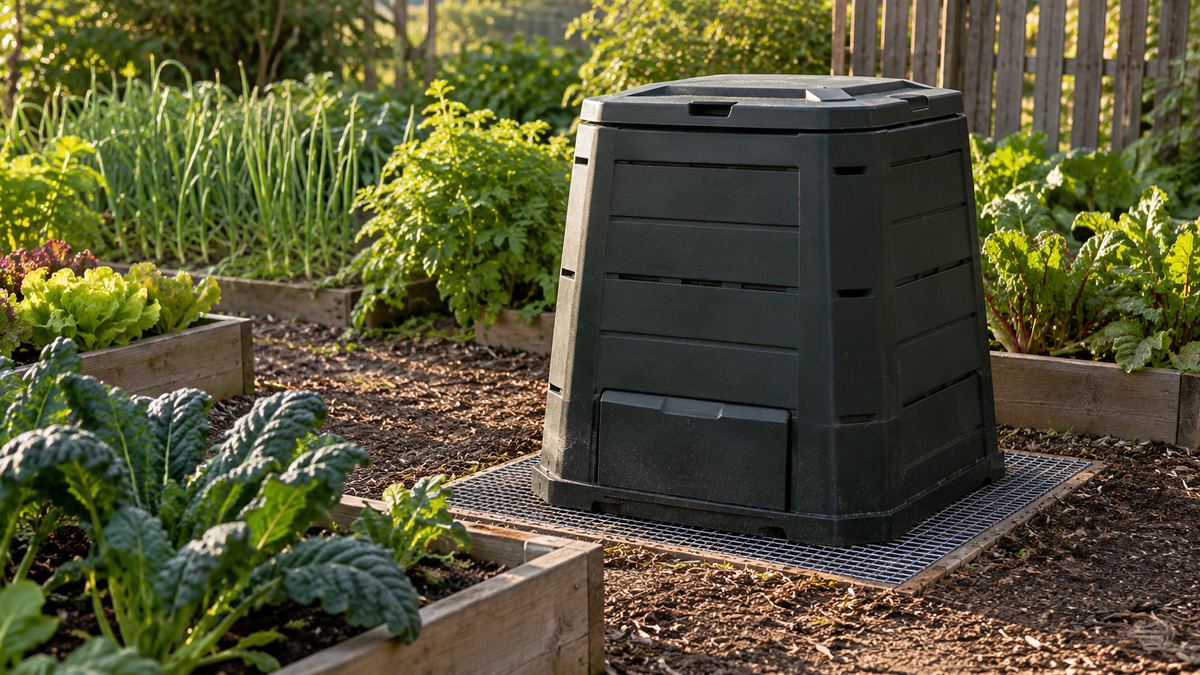
A rat near the compost bin is a reason to inspect the lid, base and contents. Start by removing access to food and finding the entry route. Replacing one bin with another will achieve little if scraps remain on the ground or rats can burrow beneath the new container.
During fall (autumn) and winter, a sheltered garden corner can offer food and nesting cover together. Compost may also provide warmth as it breaks down. Keep the bin in use only with a clear management plan, and avoid disturbing material if you suspect an occupied nest.
Check whether the bin is the source
Look from outside for holes beside the base, narrow runs through nearby vegetation, gnawed plastic and droppings around the access hatch. A loose lid or a damaged lower panel gives you a repair to make. A single sighting, however, does not establish that rats are living inside the compost.
Inspect adjacent sheds, decking, bird-feeding areas and rubbish storage. Rats may be visiting the bin from shelter elsewhere. Our UK garden rat guide helps you check the wider plot rather than treating one corner in isolation. Note where you see activity and when it happens.
Change what goes into the compost
For a standard home compost bin, exclude cooked food, meat, fish, dairy products and oily leftovers. Use the local food-waste service where available, following its accepted-materials list. Do not leave a kitchen caddy open beside the outdoor bin while waiting for enough material to make a trip worthwhile.
Suitable uncooked fruit and vegetable scraps still need management. Mix them into the existing material and cover them with garden material rather than leaving a fresh layer exposed. Clear anything dropped during filling. Keep the lid closed afterwards, including when the garden is quiet for several days.
| What you find | Change to make | Follow-up check |
|---|---|---|
| Cooked leftovers or dairy | Use the appropriate council waste collection | Check what everyone adds to the kitchen caddy |
| Scraps exposed on top | Mix suitable scraps into the compost | Clear material dropped outside |
| Gap beneath the bin | Fit a secure mesh base or suitable paving | Inspect the entire bottom edge |
| Dry, neglected material | Restore moisture and regular management | Deal with active rats before turning |
| Food elsewhere in the garden | Secure rubbish and clear spilled seed | Inspect beyond the compost corner |
Protect the base as well as the lid
A closed bin needs intact sides, a secure harvest hatch and protection underneath. Fit strong, fine metal mesh beneath a soil-based bin and secure it so rats cannot push past the edges. Avoid large openings that leave an easy route through. Wear gloves when handling cut mesh.
A solid base such as paving slabs can also prevent access from below. Make the surface stable and follow the bin maker’s drainage instructions. Do not create a container that holds stagnant water. Check the join between bin and base after installation, then again after settling or moving the bin.
Keep the compost moist and managed
Compost should be moist rather than waterlogged. Check the material as part of your normal garden routine and adjust dry or wet ingredients as needed. Once rat activity has been addressed, turn it regularly with suitable tools. A heap left dry and untouched for months offers more undisturbed space.
Moisture and turning support compost management; neither guarantees rodent removal. Do not flood a suspected burrow, pour cleaning chemicals into the heap or reach into a possible nest. If rats are present, ask a pest controller how to deal with them before emptying or rebuilding the bin.
Choose a place you can inspect
Keep the bin away from the house where practical, with space to see and maintain its edges. Avoid squeezing it behind dense shrubs against an external wall. You need room to open the lid, inspect the base and notice damage without pulling apart a stack of garden equipment.
Move stored seed and pet food into secure containers, and clear fallen fruit nearby. Seasonal decorations count as food too. The guide to pumpkins and rats explains why scraps and deteriorating displays should not linger around the doorstep or compost area.
Ask for help if activity continues
Before contacting the council, check whether neighbouring bins share the same sheltered boundary. Describe what you can see from your own garden without disturbing burrows. Coordinating food storage and repairs across adjoining plots can help avoid a cycle where activity shifts a short distance and then returns to the compost corner.
Check your local council’s pest-control information and composting advice. Services and charges vary. Describe the signs, the bin type and what you have already changed. Recurring burrows, activity near the house or evidence in several garden areas justify a broader inspection rather than repeated bin repairs.
After repairs, keep a brief record of new signs and inspect the lid and base during routine filling. Ultrasonic deterrents are only a supporting measure: results vary and sound does not pass through walls or closed containers. A device indoors cannot protect the contents of an outdoor compost bin.